Initially, you’ll need to do some experimental hangs on different-size edges and pockets to identify what features you can hang on for about 15 seconds before grip failure. Actual training hangs should terminate a few seconds before failure, so I recommend making each hang exactly 12 seconds in length. By design, this training protocol will produce little or no muscle pump as it primarily targets the anaerobic alactic energy system. As you gain strength, keep your hangboard training progressive by using smaller holds or fewer fingers. Really strong climbers may be able to hang on holds as small as 8mm or even 6mm. Though painful, these tiny-edge hangs may increase “pulp”—the fleshy tip of your fingers that, like sticky rubber shoe soles, deforms over small rock holds to provide grip!
- Do a 12-second hang using a feature that you can barely hold for 15 seconds with maximum effort.
- Rest for exactly 3 minutes.
- Do four more hangs following the above protocol to make for a set of five hangs. Each hang should be near maximal, but not quite take you to failure.
- After doing the first set of five hangs, rest for 5 to 10 minutes before doing a second set of five hangs. Initially focus on training the half-crimp and open-crimp grip—one set of each. Advanced climbers can do one or two additional sets that target three-finger drag and the various one- and two-finger pocket grips.
- Keep detailed notes of the holds used and the number of hangs and sets performed.
2. Maximum Weight 10-Second Protocol
As you gain strength from doing the minimum-edge protocol explained above, you’ll eventually come to the point of needing to train on some really small holds that hurt and, perhaps, tempt “dry-firing” (explosively slipping off the finger hold) or injury. It’s at this time (if not sooner) that you should switch to one of the two maximum-weight protocols detailed here.
The beauty of “max hang” protocols is that you increase intensity by adding weight rather than using smaller holds—this makes for less skin pain and little risk of dry-firing. The ideal size edge for weighted hangs is around three-quarters the length of your first finger pad (index finger). If you’re new to weighted hangs I recommend using a hold between 20mm and 23mm. In the future, you may find that training on a 14mm edge with less weight added is the way to go. Experiment!
While some folks employ a weight belt or vest to add resistance, I recommend investing in a few free weight plates and a loading pin that you can hang from the belay loop of your harness. This makes it super easy to unclip the weights and de-load between hangs. Buy a loading pin and cheap free weight plates on Craigslist.
Really strong climbers may need to add up to 100 pounds—beyond this point, I recommend transitioning to mostly one-arm hangboard training (an elite strategy) which I’ll detail in a separate article.
- Do a 10-second hang using an edge or pocket that you can barely hold for 13 seconds with a maximum effort. Adjust weight as needed to meet this goal.
- Rest for exactly 3 minutes.
- Do four more hangs following the above protocol. Each hang should be near maximal (rating of perceived exertion of 9 to 9.5 out of 10), but not quite take you to failure.
- After doing the first set of five hangs, rest at least 5 minutes before doing a second set of five hangs. Initially focus on training the half-crimp and open-crimp grip—one set of each. Advanced climbers can do one or two additional sets that target three-finger drag and the various one- and two-finger pocket grips. Be sure to rest at least 5 minutes between sets, and adjust the amount of weight added for each set (and grip position) to stay within the guidelines detailed above.
- Keep detailed notes of the holds used, weight added, and the number of hangs and sets performed.
3. Maximum Weight "7-53" Protocol
This is an advanced maximum-weight protocol that I created to train maximum strength and foster more aerobic power (by stressing the muscles to increase the rate of CP resynthesis during the 53-second rest between maximal hangs). It’s also a very time-efficient protocol for elite climbers doing multiple sets. This is my favorite finger-strength protocol!
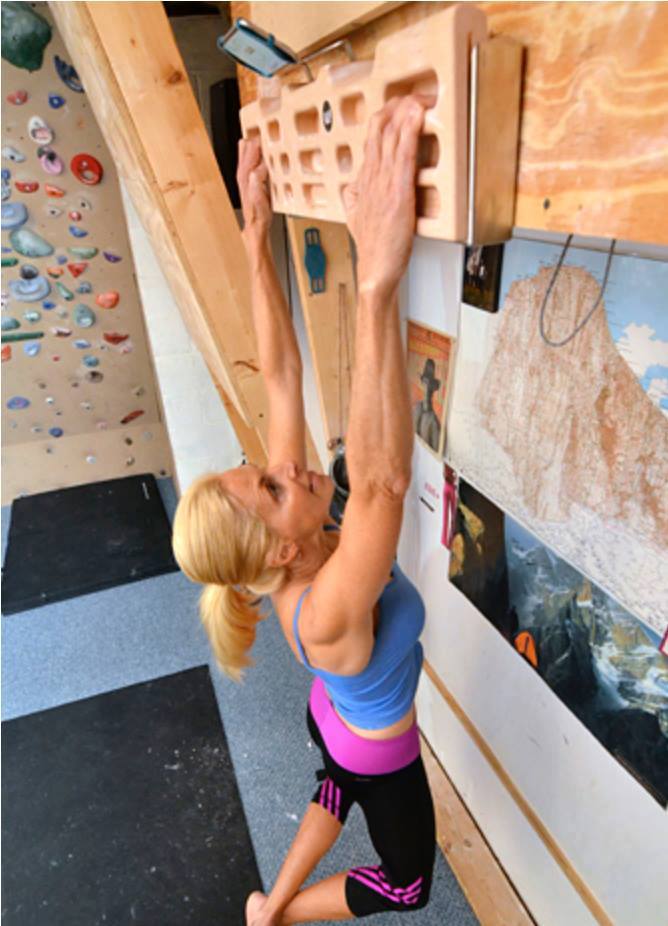
- Do a 7-second weighted hang on a feature that you can barely hold for 10 seconds with maximum effort. I recommend using 14 - 20mm crimp edges, 20 - 30mm two-finger pockets, three-finger drag (photo), and if you’re really strong, monos. As with the previous max-weight hang protocol, your combination of hold and weight-added should make each hang near-maximal.
- Rest for exactly 53 seconds. This way each hang-rest couplet takes exactly 1 minute.
- Do two more hangs following the above protocol. Each hang should be near maximal (rating of perceived exertion of 9 to 9.5 out of 10), but not quite take you to failure…except, perhaps, on the third hang of a set.
- After doing the first set of three hangs, rest 3 to 5 minutes before doing a second set of three hangs. Initially, focus on training the half-crimp and open-crimp grips—one set each. Advanced climbers can do a second set for each half- and open-crimp grips, plus one or two additional sets that target one- and/or two-finger pockets. Limit yourself to a maximum of six sets.
- Keep detailed notes of the holds used, the weight added, and the number of hangs and sets performed.
Strength-Endurance Training with “Repeaters”
Strength endurance is the capacity to maintain a high level of force production throughout repeated efforts lasting up to about one minute in duration. This is the stuff of gripping up long, hard boulder problems and route crux sequences.
Excelling in these strenuous situations demands high neural drive and alactic power, but also a significant anaerobic reserve (anaerobic lactic system). Furthermore, brief “micro rests” between grips and the longer breaks between boulders (and during on-route rests) allow the aerobic energy system to come significantly into play to drive recovery of ATP/CP and efflux of lactate and H+ ions between efforts. Since Repeaters closely mimic these climbing situations—and stress all three bioenergetics systems—it’s the go-to exercise for developing strength-endurance in the finger flexor muscles.
An important bit of training nuance before we get to the two most popular repeater-training protocols. The intensity and volume of your repeater training will determine the degree to which the protocol targets the anaerobic and aerobic systems. For example, people who mainly boulder can more greatly target the anaerobic systems by doing five sets of repeaters at high intensity (smaller holds and/or more resistance), but longer rests between sets (~5 minutes). Conversely, a route climber wanting to equally train the anaerobic and aerobic energy systems should do ten to twenty sets of Repeaters on less-difficult holds (or with less than bodyweight via a counterweight system) and with only one minute of rest between sets.
The two following protocols are designed according to the latter concept of training all three energy systems nearly equally.
4. Repeaters - 7/3 Protocol
This is the go-to Repeater training protocol for top route-climbers around the world! You’ll want to use a timing App to be precise with the 7/3 hang-rest intervals. Keep it crisp—no cheating and no chalking up between hangs. (No, you can’t chalk up in 3 seconds—this is only enough time for a quick shake. If you have sweaty hands that require chalk between hangs, then use the 10/5 protocol below.)
- Pick three to seven different grip types to train, and do one to three sets per grip. In addition to the half-crimp and open-crimp grips, select a few others such as two-finger pocket “inside pair”, “middle pair”, and “outside pair”. Strong, veteran climbers can also train monos. Train one grip per set, and cycle through all the different grips as you proceed through your many sets of repeaters. As described above, this route climber’s protocol involves doing ten sets (less trained) to twenty sets (highly trained) on moderate-sized holds and at moderate intensity.
- Each set is comprised of six hang-rest intervals consisting of a 7-second hang and 3-second rest.
- After the one minute of Repeaters, rest for exactly one minute.
- Do your next set of six 7/3 Repeaters with a different grip position.
- Rest again for one minute.
- Continue in this fashion for a total of 10 to 20 sets. As you fatigue, use larger holds (or remove more weight via pulley counterweight) so that you never pump out or fail on any given set.
- NOTE: Repeater training to preferentially target the anaerobic pathways must utilize high-intensity hangs, although few sets and more rest between sets. Watch this video for an example of a more anaerobic-system-focused 7/3 protocol.
5. Repeaters - 10/5 Protocol
If you’ve got sweaty hands that require frequent chalking, then this is the Repeater protocol for you! It will provide virtually the same training stimulus (i.e. time under tension is 40 seconds per set rather than 42 seconds) and benefits as the 7/3 protocol described above. However, the 5-second rest between hangs is just enough for a quick dip of chalk!
- As with the 7/3 protocol, select several different grip positions to train and target one grip per set. Select hold size and weight (added or removed) to keep the intensity moderate enough that you never approach failure on any set of Repeaters. To target the anaerobic and aerobic systems nearly equally you’ll want to shoot for a perceived exertion of around 7 out of 10.
- Each set is comprised of four 10/5 hang-rest intervals.
- After this one minute of Repeaters, rest for exactly one minute.
- Do your next set of four 10/5 Repeaters with a different grip position.
- Rest again for one minute.
- Continue in this fashion for a total of 10 to 20 sets. As you fatigue, use larger holds (or remove more weight via pulley counterweight) so that you never pump out or fail on any given set.
- For a more anaerobic-system-focused Repeater protocol watch this video.
F.A.Q. on Hangboard Training
What’s better, a hangboard made of wood or molded plastic?
If you tend to have sweaty fingers, then the texture modeled into a plastic board may be a plus. However, extensive training with added weight tends to be more comfortable on a wooden hangboard. Ultimately, it’s a matter of personal preference. Some climbers purchase a few different hangboards in order to vary grip types and texture as needed from session to session.
What is the proper arm, shoulder, and torso positioning for safe and effective hangboarding?
No matter the fingerboard protocol you choose, it’s essential to train with good technique! Maintain muscular tension throughout your shoulders and upper torso by engaging your scapular stabilizers and rotator cuff—think "shoulders down, chest out". Never hangboard train with relaxed/passive shoulders and a hollowed chest! Lift your knees only slightly to develop necessary core stiffness, and never train with the full-crimp grip (i.e. “closed crimp” with thumb lock). Also important: engage in twice-weekly training of the scapular stabilizers and rotator cuff muscles—consult Training For Climbing for comprehensive instruction on antagonist, stabilizer, and forearm flexor muscle training....and a whole lot more!
How can I best nourish my tendons and muscles to gain strength, accelerate recovery, and reduce injury risk?
Research has shown distinct nutritional protocols to support tendon health, connective tissue recovery, and strength/power gains! Consuming vitamin C-enriched hydrolyzed collagen before targeted training is the lynchpin of the protocol shown to double collagen synthesis after exercise. This is revolutionary information for a hard-training climber wanting to develop stronger, more injury-resistant tendons and ligaments/pulleys! Save 15% off Supercharged Collagen with code SEND15 here >>
Furthermore, post-workout consumption of Leucine-rich protein has been shown to amplify mTOR signaling and muscle protein synthesis. Whey protein isolate is the best protein supplement for climbers, given its ultra-clean, low-calorie, and high-leucine characteristics. Vegan athletes can best support tendon and muscles recovery with Powerplex plant-based protein.
What’s an appropriate warm-up for a hangboard workout?
A progressive warm-up is essential to prepare the finger flexor muscles, scapular stabilizers and, most importantly, the flexor tendons and ligament pulleys (commonly injured). Ideally, begin with a brief full-body activity to elevate heart rate (Burpee, jumping jacks, jogging, or similar) followed by a few sets of easy upper-body warm-up exercises (a few pull-ups on jug holds, a few push-ups and/or dips, and gentle rotator cuff warm-ups). Conclude your warm-up with some mild finger flexor/extensor stretching and massage of the forearms and fingers.
How often can I hangboard train?

In depends on many things…including your climbing experience, loading (and injury) history, frequency of climbing, rest and nutrition habits, and even age and genetics. A few rough rules of thumb: 1. If you’re new to hangboard training, then two moderate sessions per week is plenty, in addition to a day or two of actual climbing. 2. Advanced (and healthy) climbers may do up to five sessions per week, but with only two of these sessions being maximum-weight workouts. 3. When “performance climbing” (outdoors or in competition) use the hangboard only as a warm-up tool! 4. Reduce volume and frequency of hangboarding (and climbing) at the first sign of finger pain—this pain is evidence of an adverse perturbation in collagen homeostasis. 5. Cease hangboard train in the wake of an acute injury. (If you suspect a pulley tear, consult a doctor—immediate use of a “ring splint” has been shown to accelerate recovery.) Very submaximal hangs may help support injury rehab, but do this only once you’re beyond the acute injury stage. 6. When in doubt, err on the side of doing less, not more—too much hangboard training will eventually lead to overtraining and injury. Save 15% off all full-price PhysiVantage Nutrition with code SEND15 here >>
Copyright © 2020 - 2023 Eric J. Hörst | All Rights Reserved.